Set up professional email using self-hosted SMTP server
For those who had followed the instructions in this article, we have to inform you that this configuration doesn't work anymore. You will need to follow the instructions below to synchronize with the new system. If you hadn't followed these instructions, you can skip step 5:
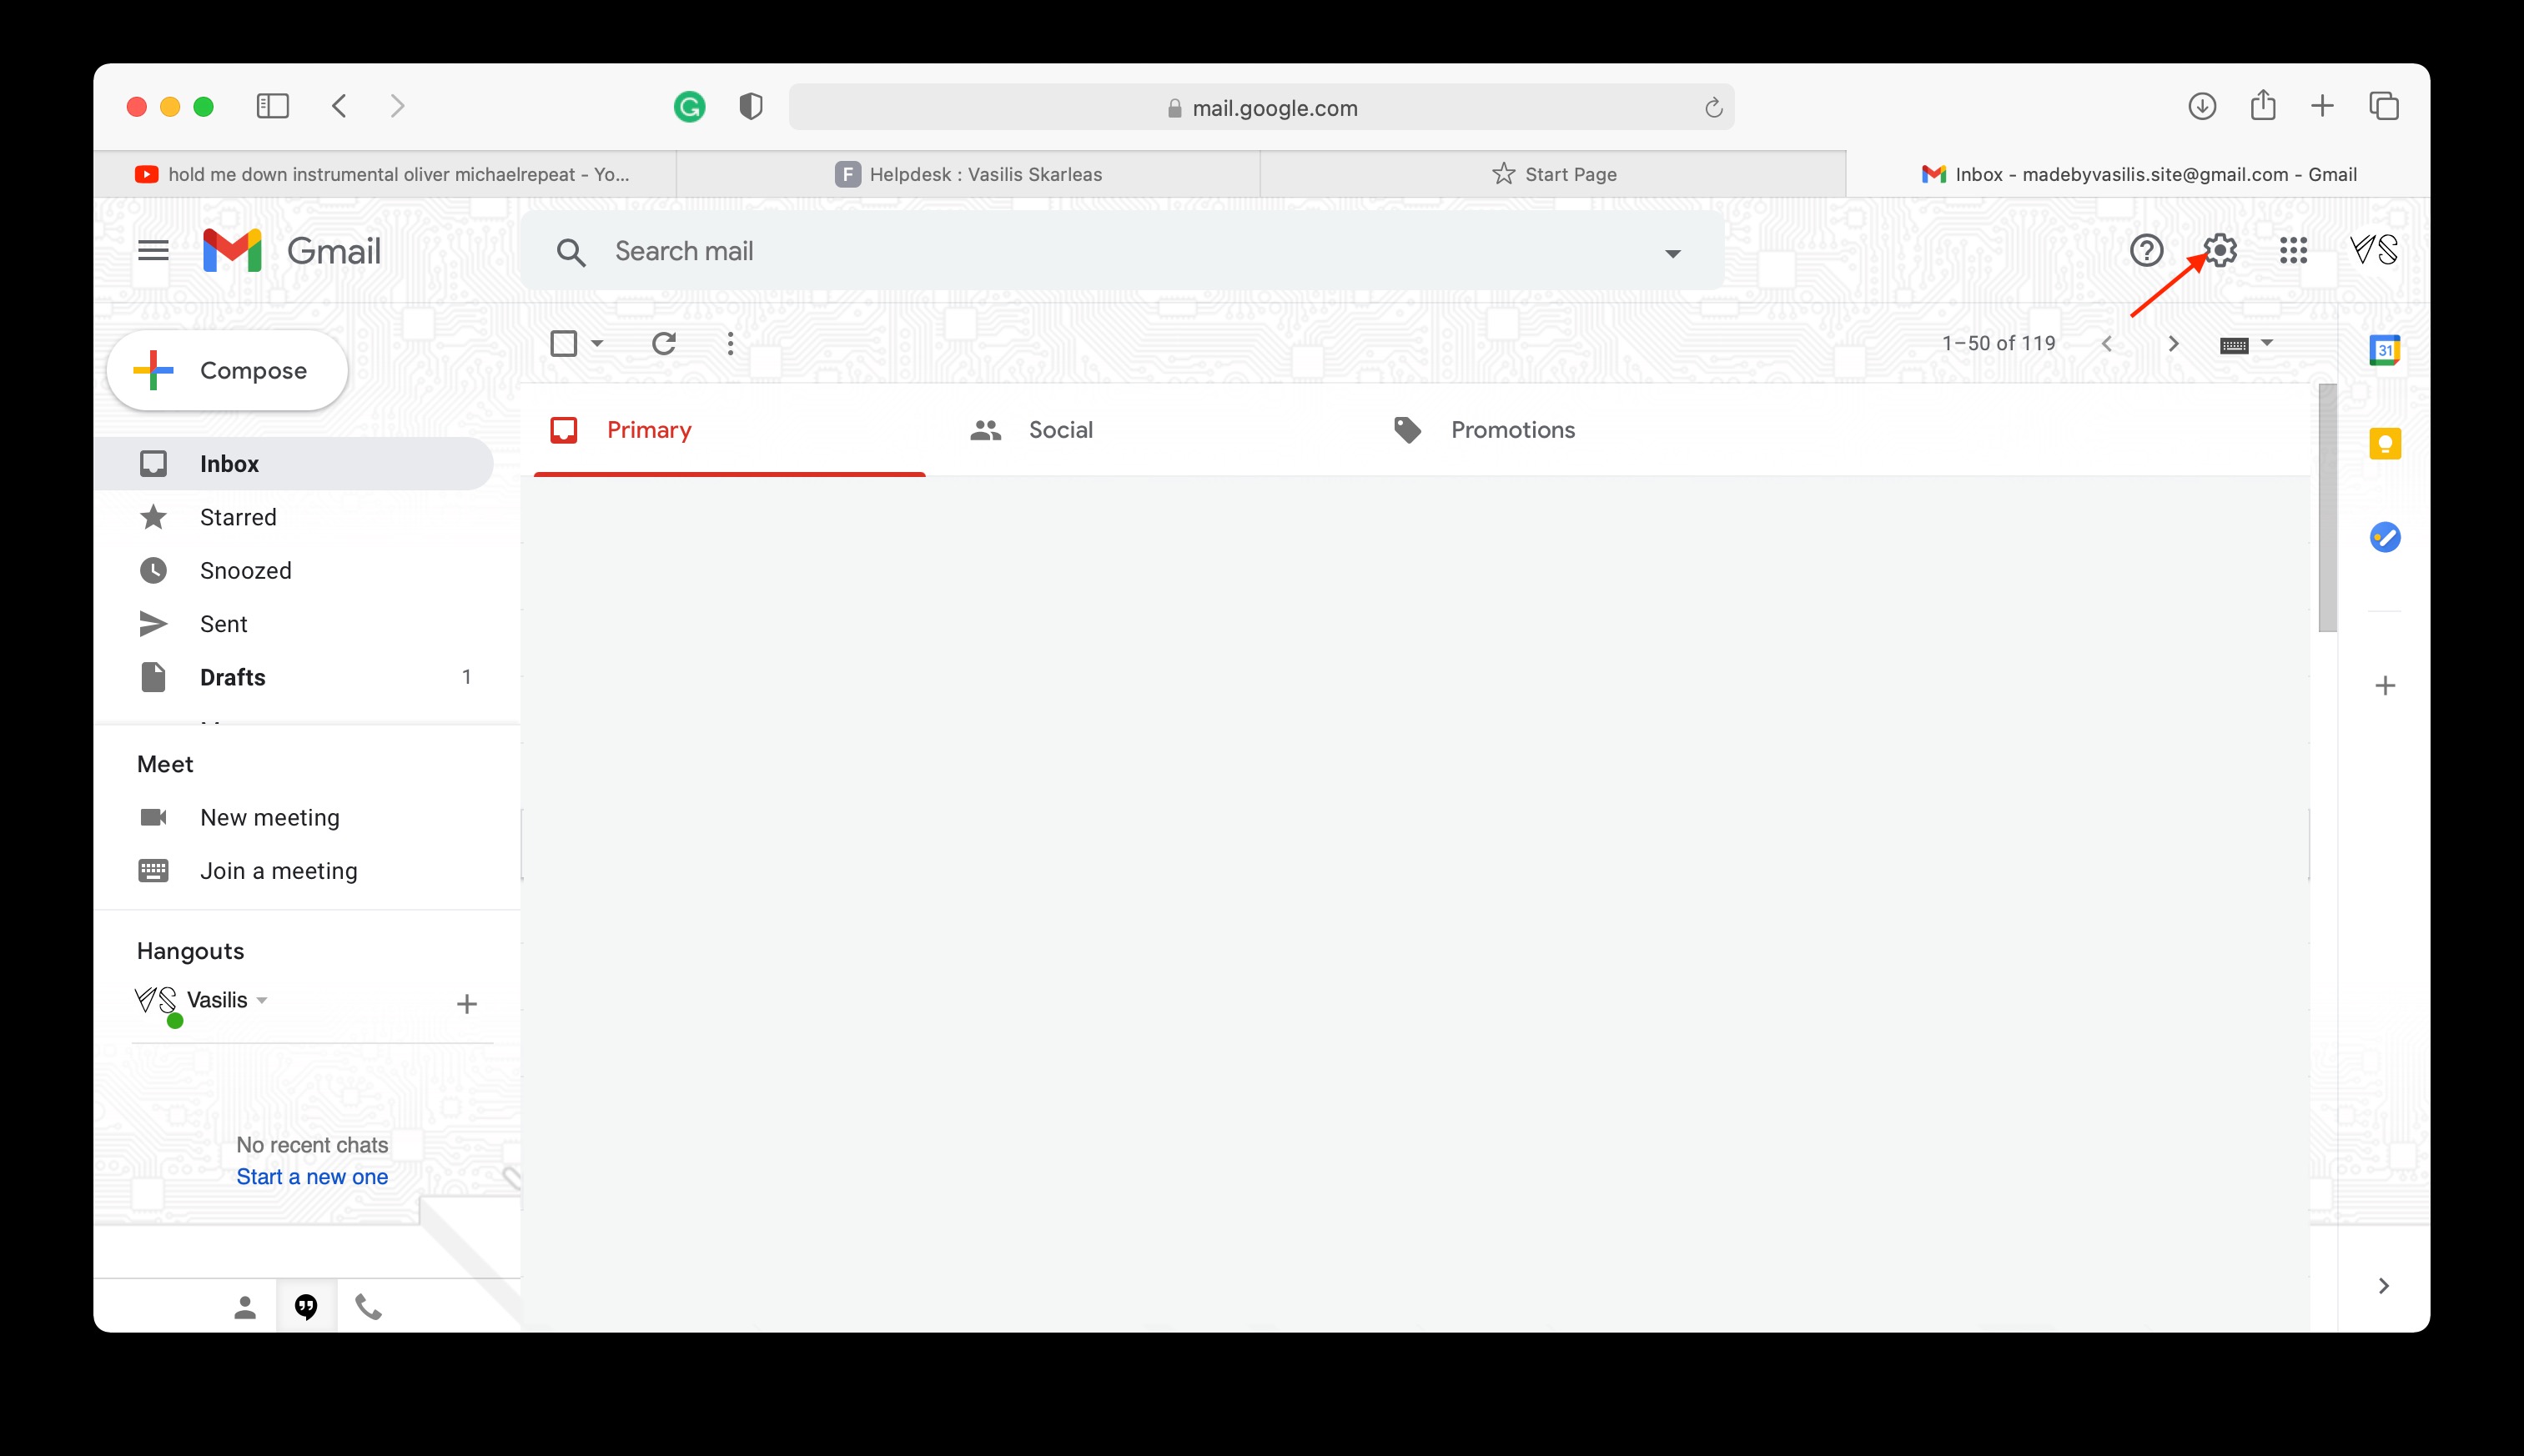
- Login to your Gmail account from a PC at https://mail.google.com
- Click on the Settings icon on the upper right corner
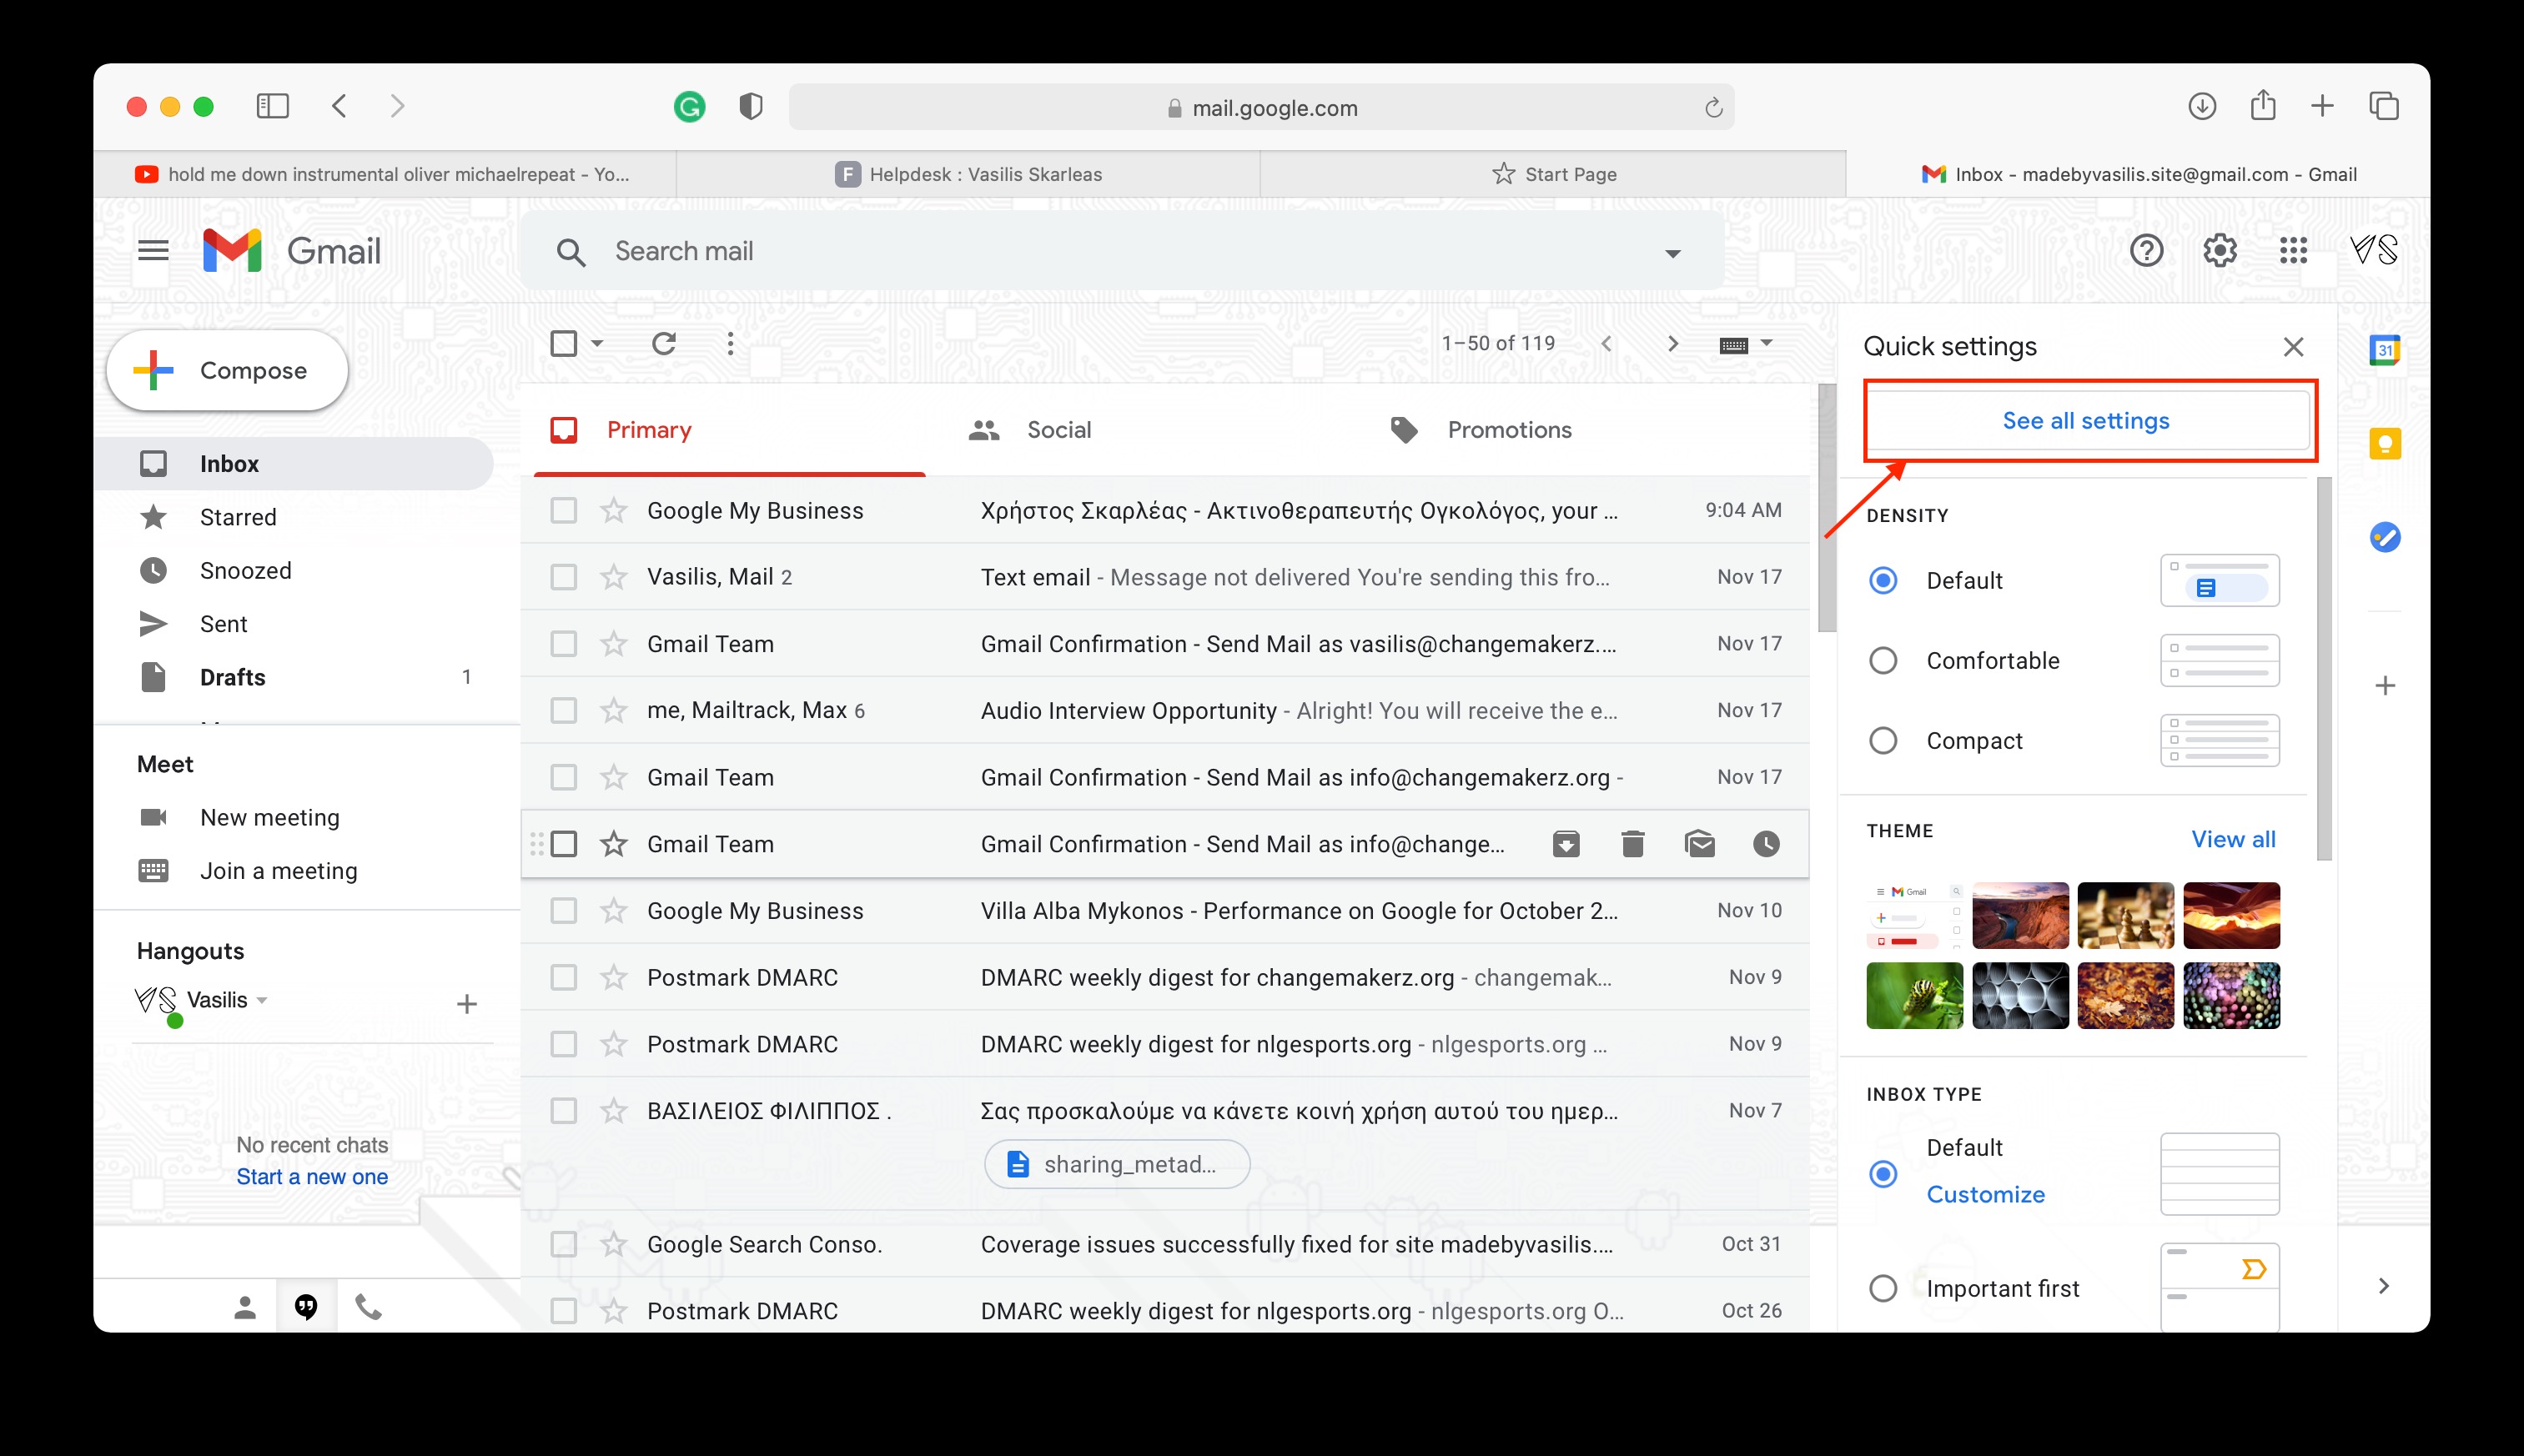
- Click at "See all settings"
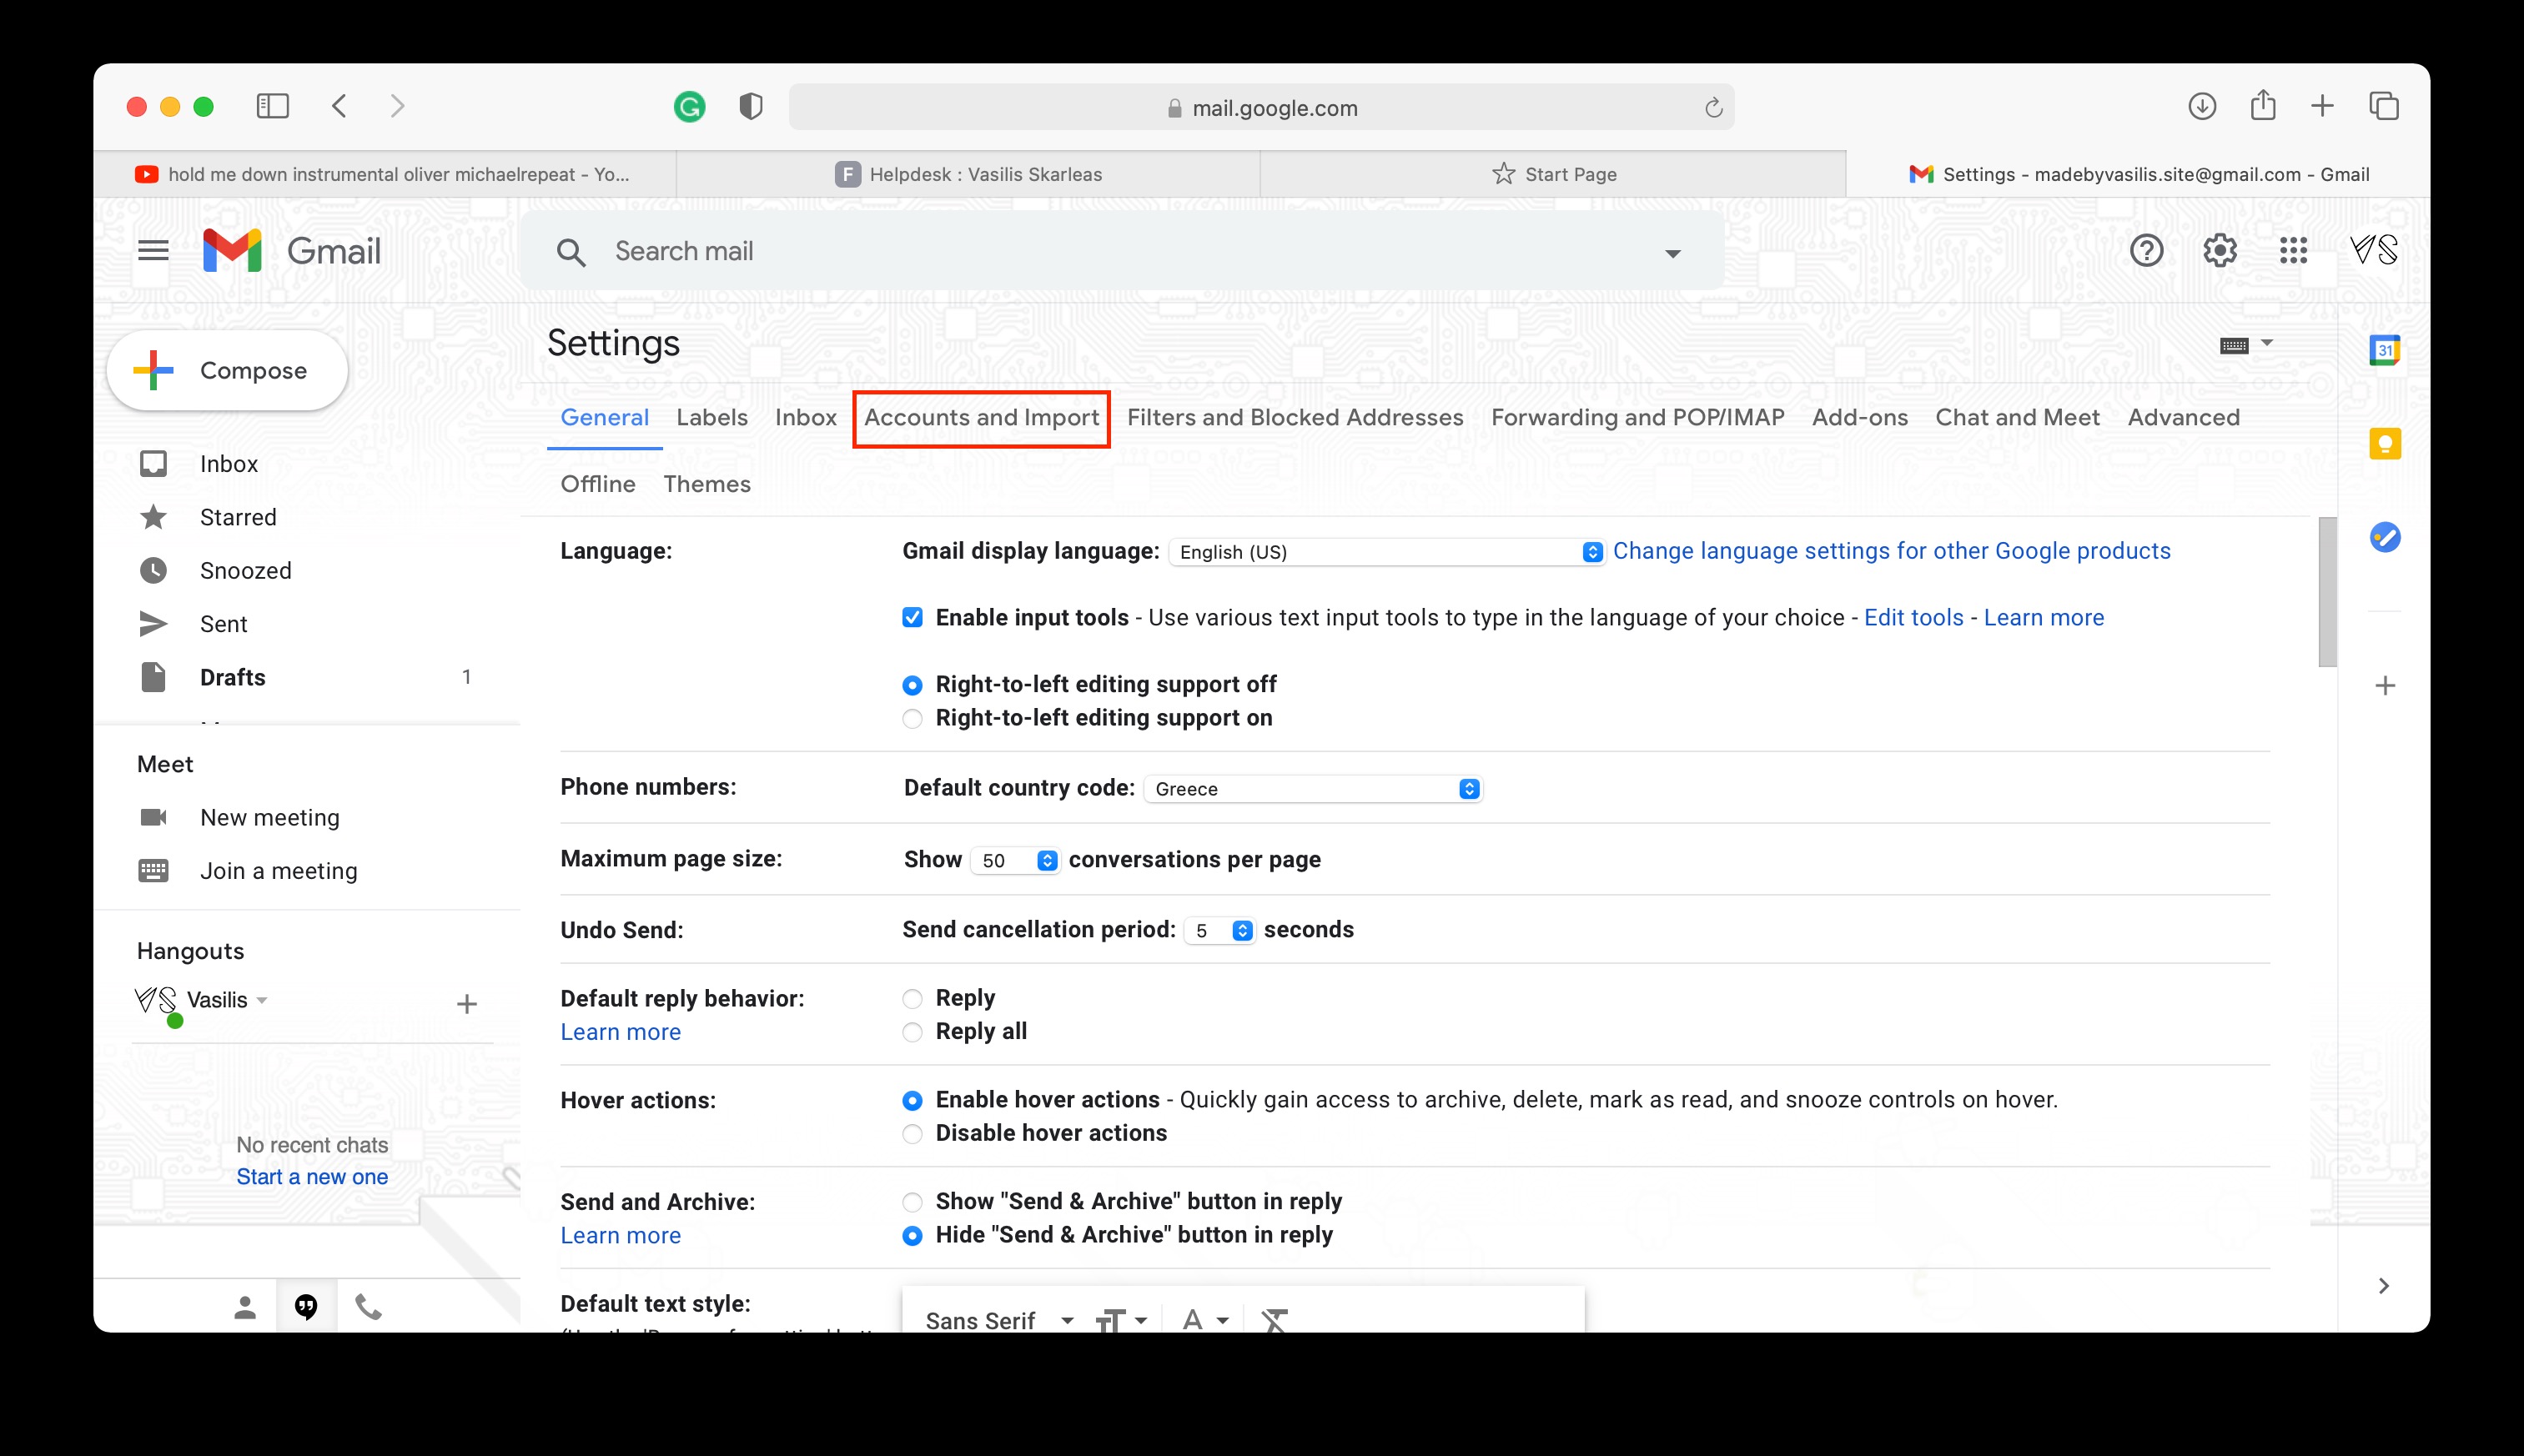
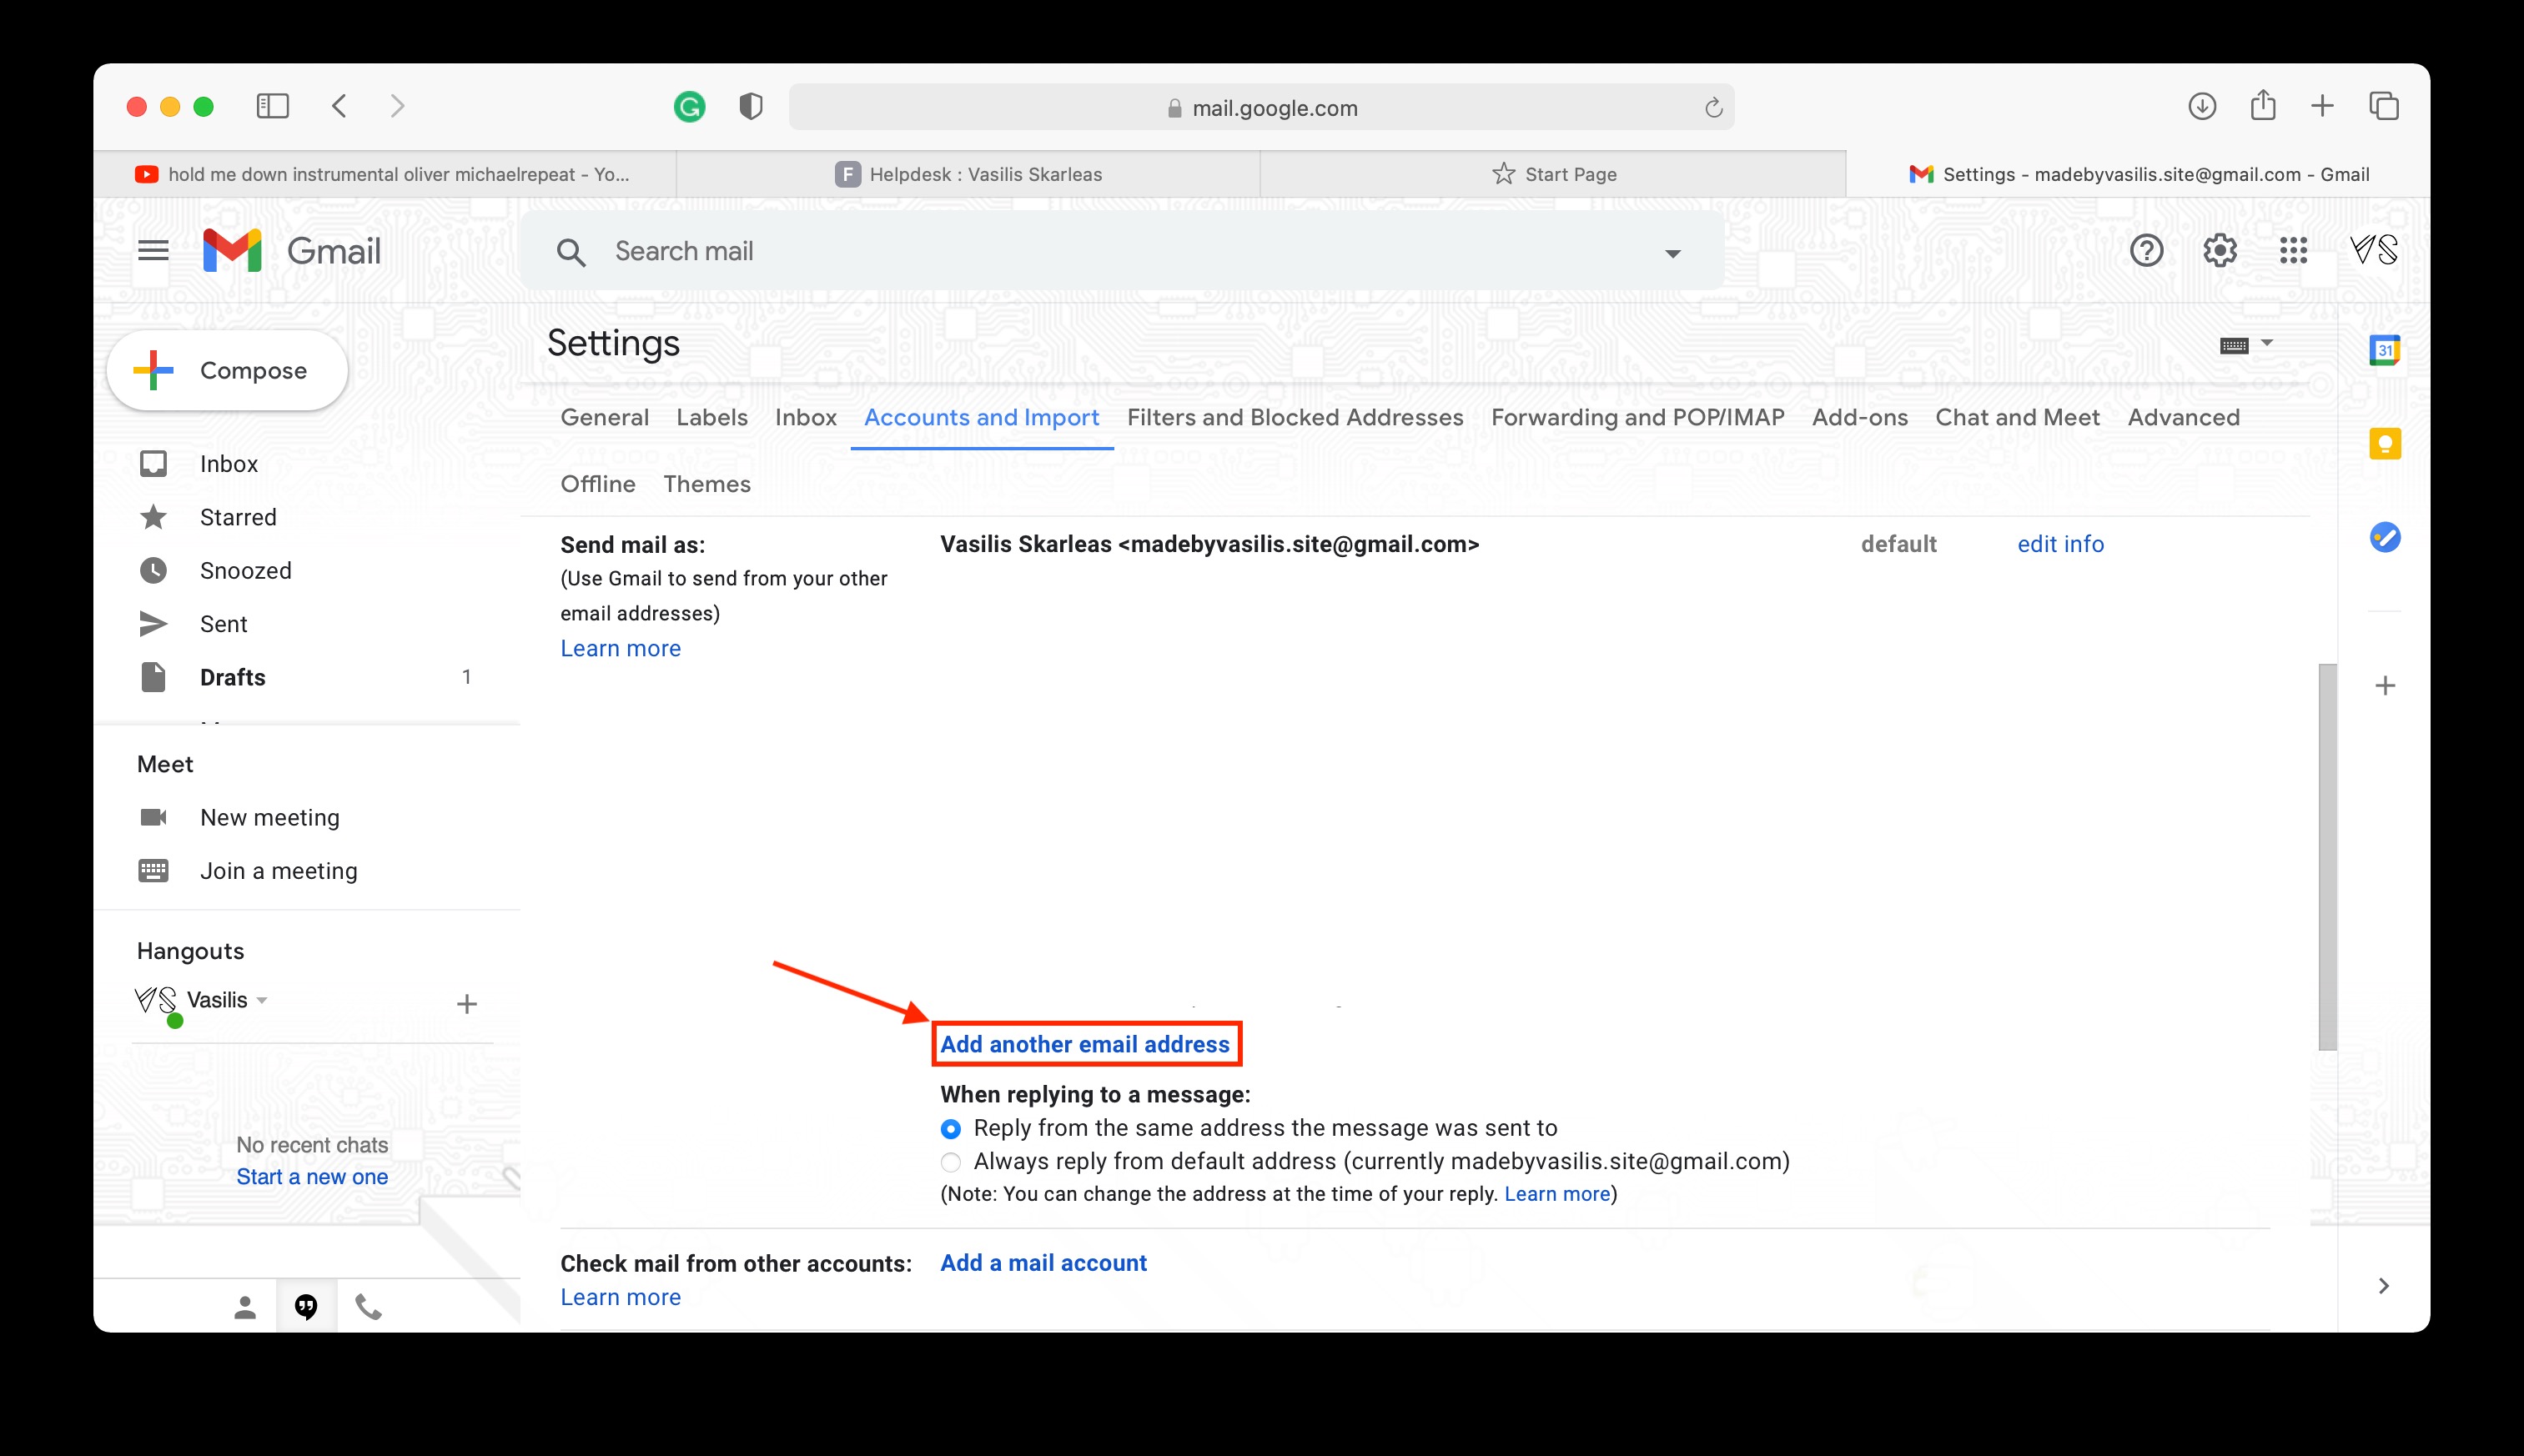
- Navigate to the "Accounts and imports tab"
- On the "Send mail as:" section, find the professional email address that you inserted the first time, something like [username]@changemakerz.org and click Delete.
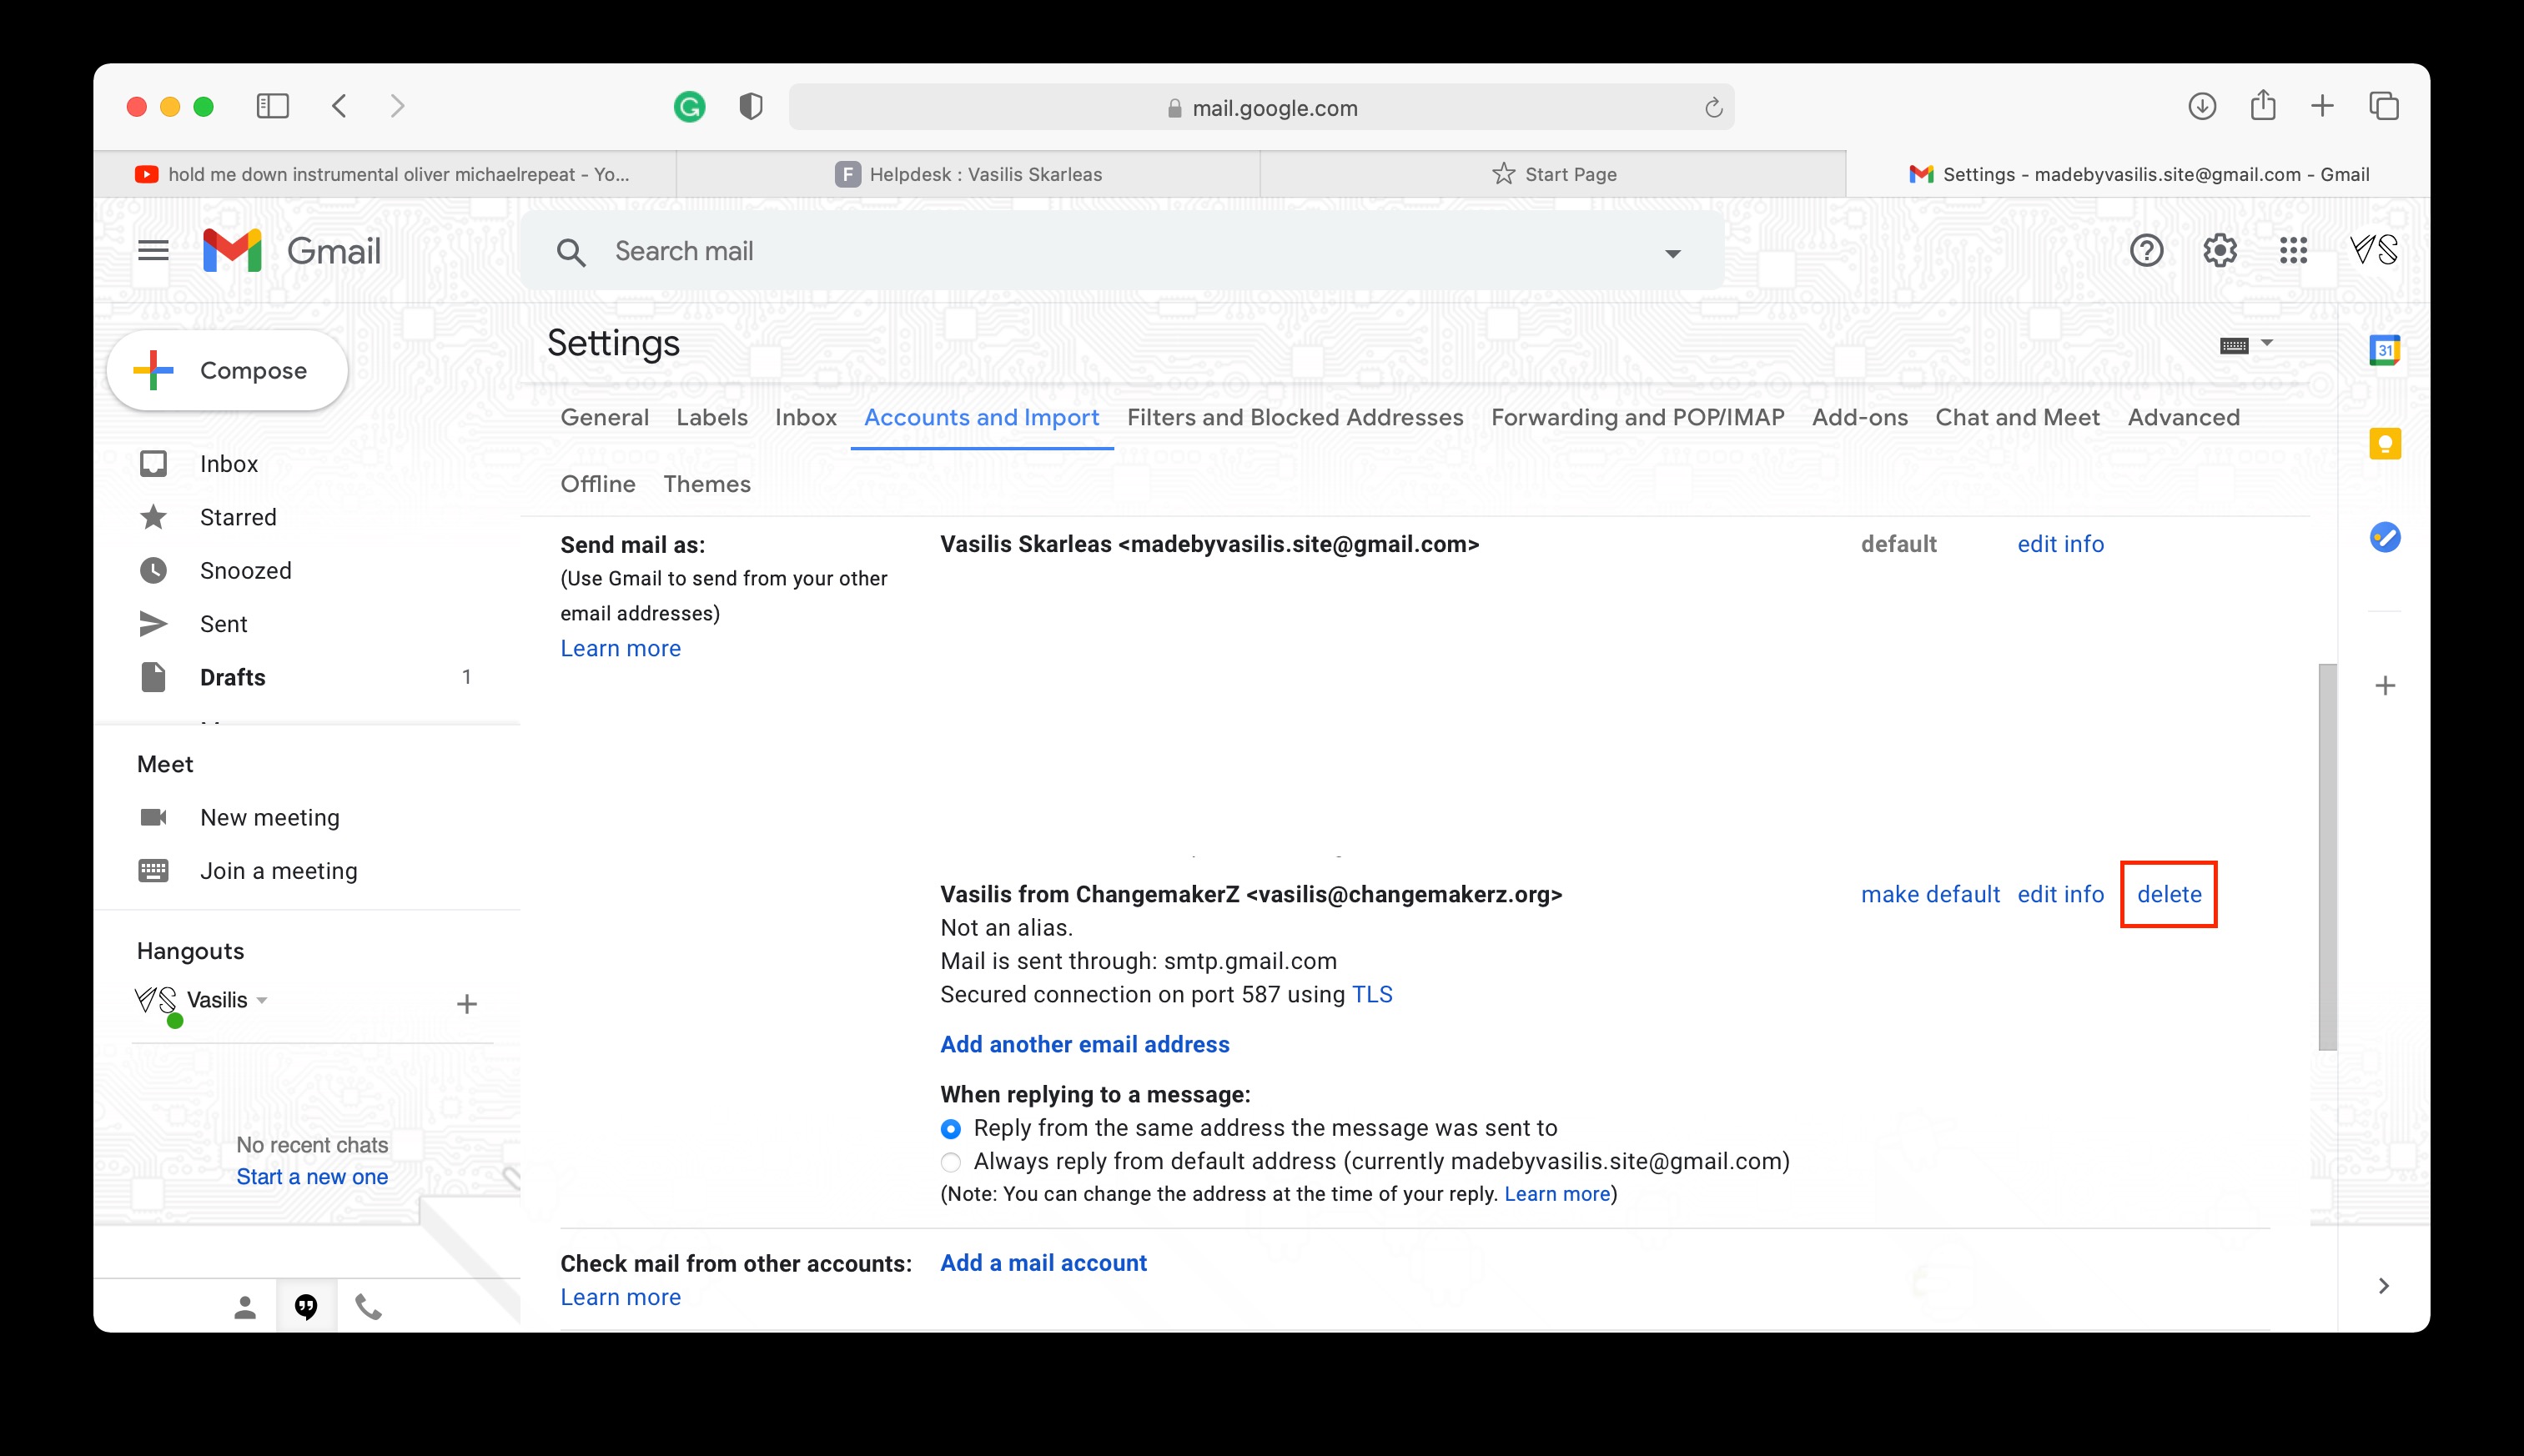
- Now, click on "Add another email address"
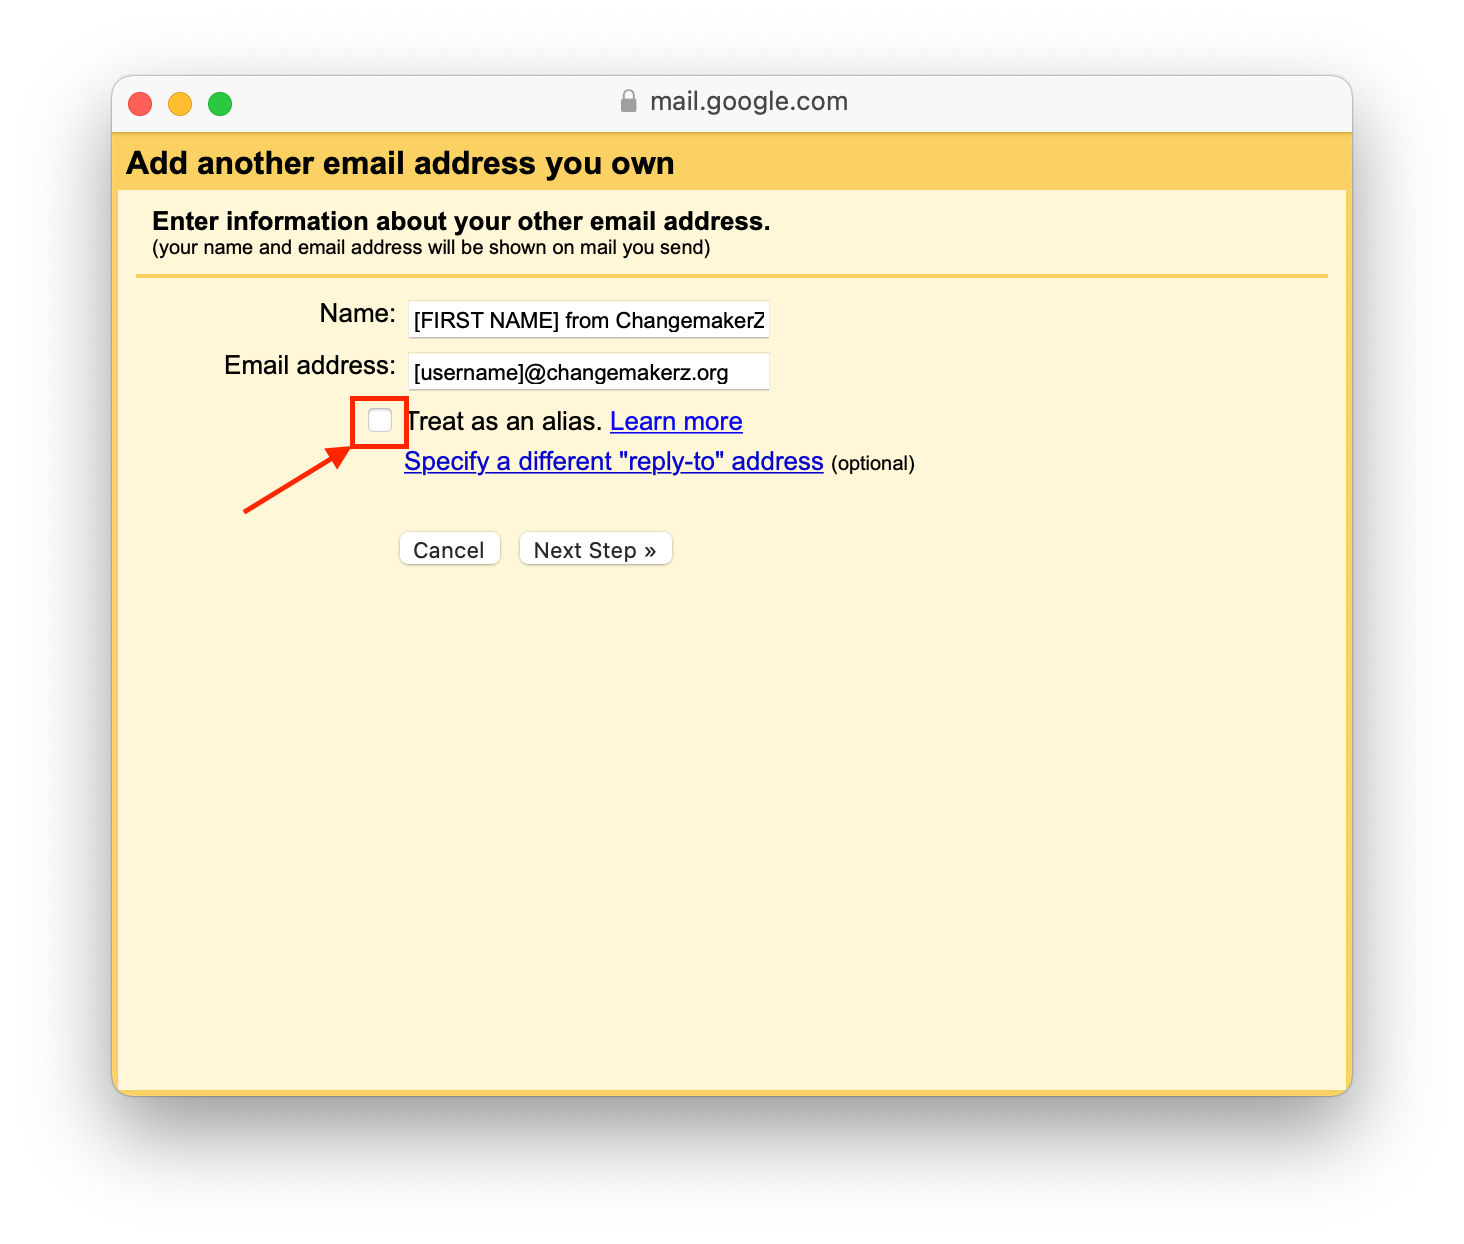
- A pop-up will open or a new tab will open and you have to fill out the Name and the Email Address fields by using this formula below:
- Name: [YOUR_FIRST_NAME] from ChangemakerZ
- Email address: [username]@changemakerz.org
- Treat as an alias: Uncheck the box
- When you have clicked next, this page will appear and you have to fill out the fields by including this information:
ATTENTION: You have to send an email to helpdesk@changemakerz.org to request your username and password.SMTP Server smtp.postmarkapp.com Port: 587 Username [provided-username] Password [provided-password] 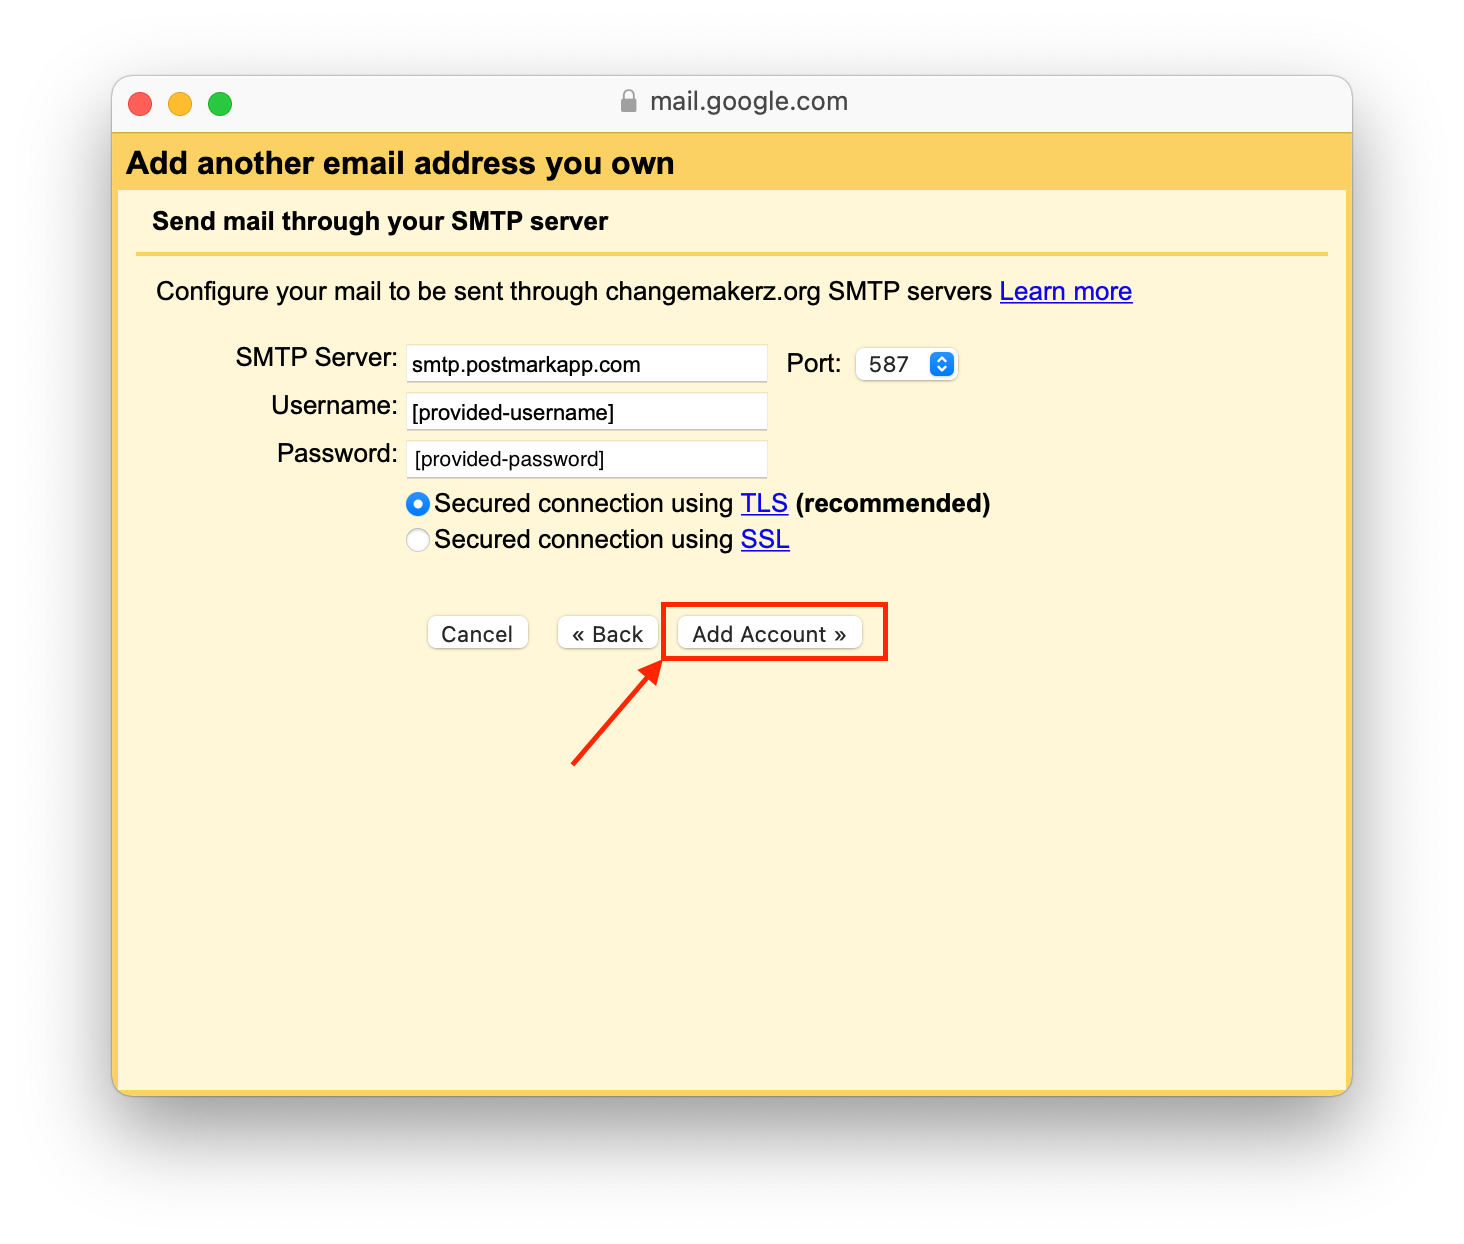
- After you have clicked "Add Account >>", will appear a page saying that the Gmail Team has sent a verification code to your inbox. Go to your inbox and search for an email from the Gmail Team
- The email will look like the one below. Click on the provided link to verify the external SMTP server and you are ready to go.
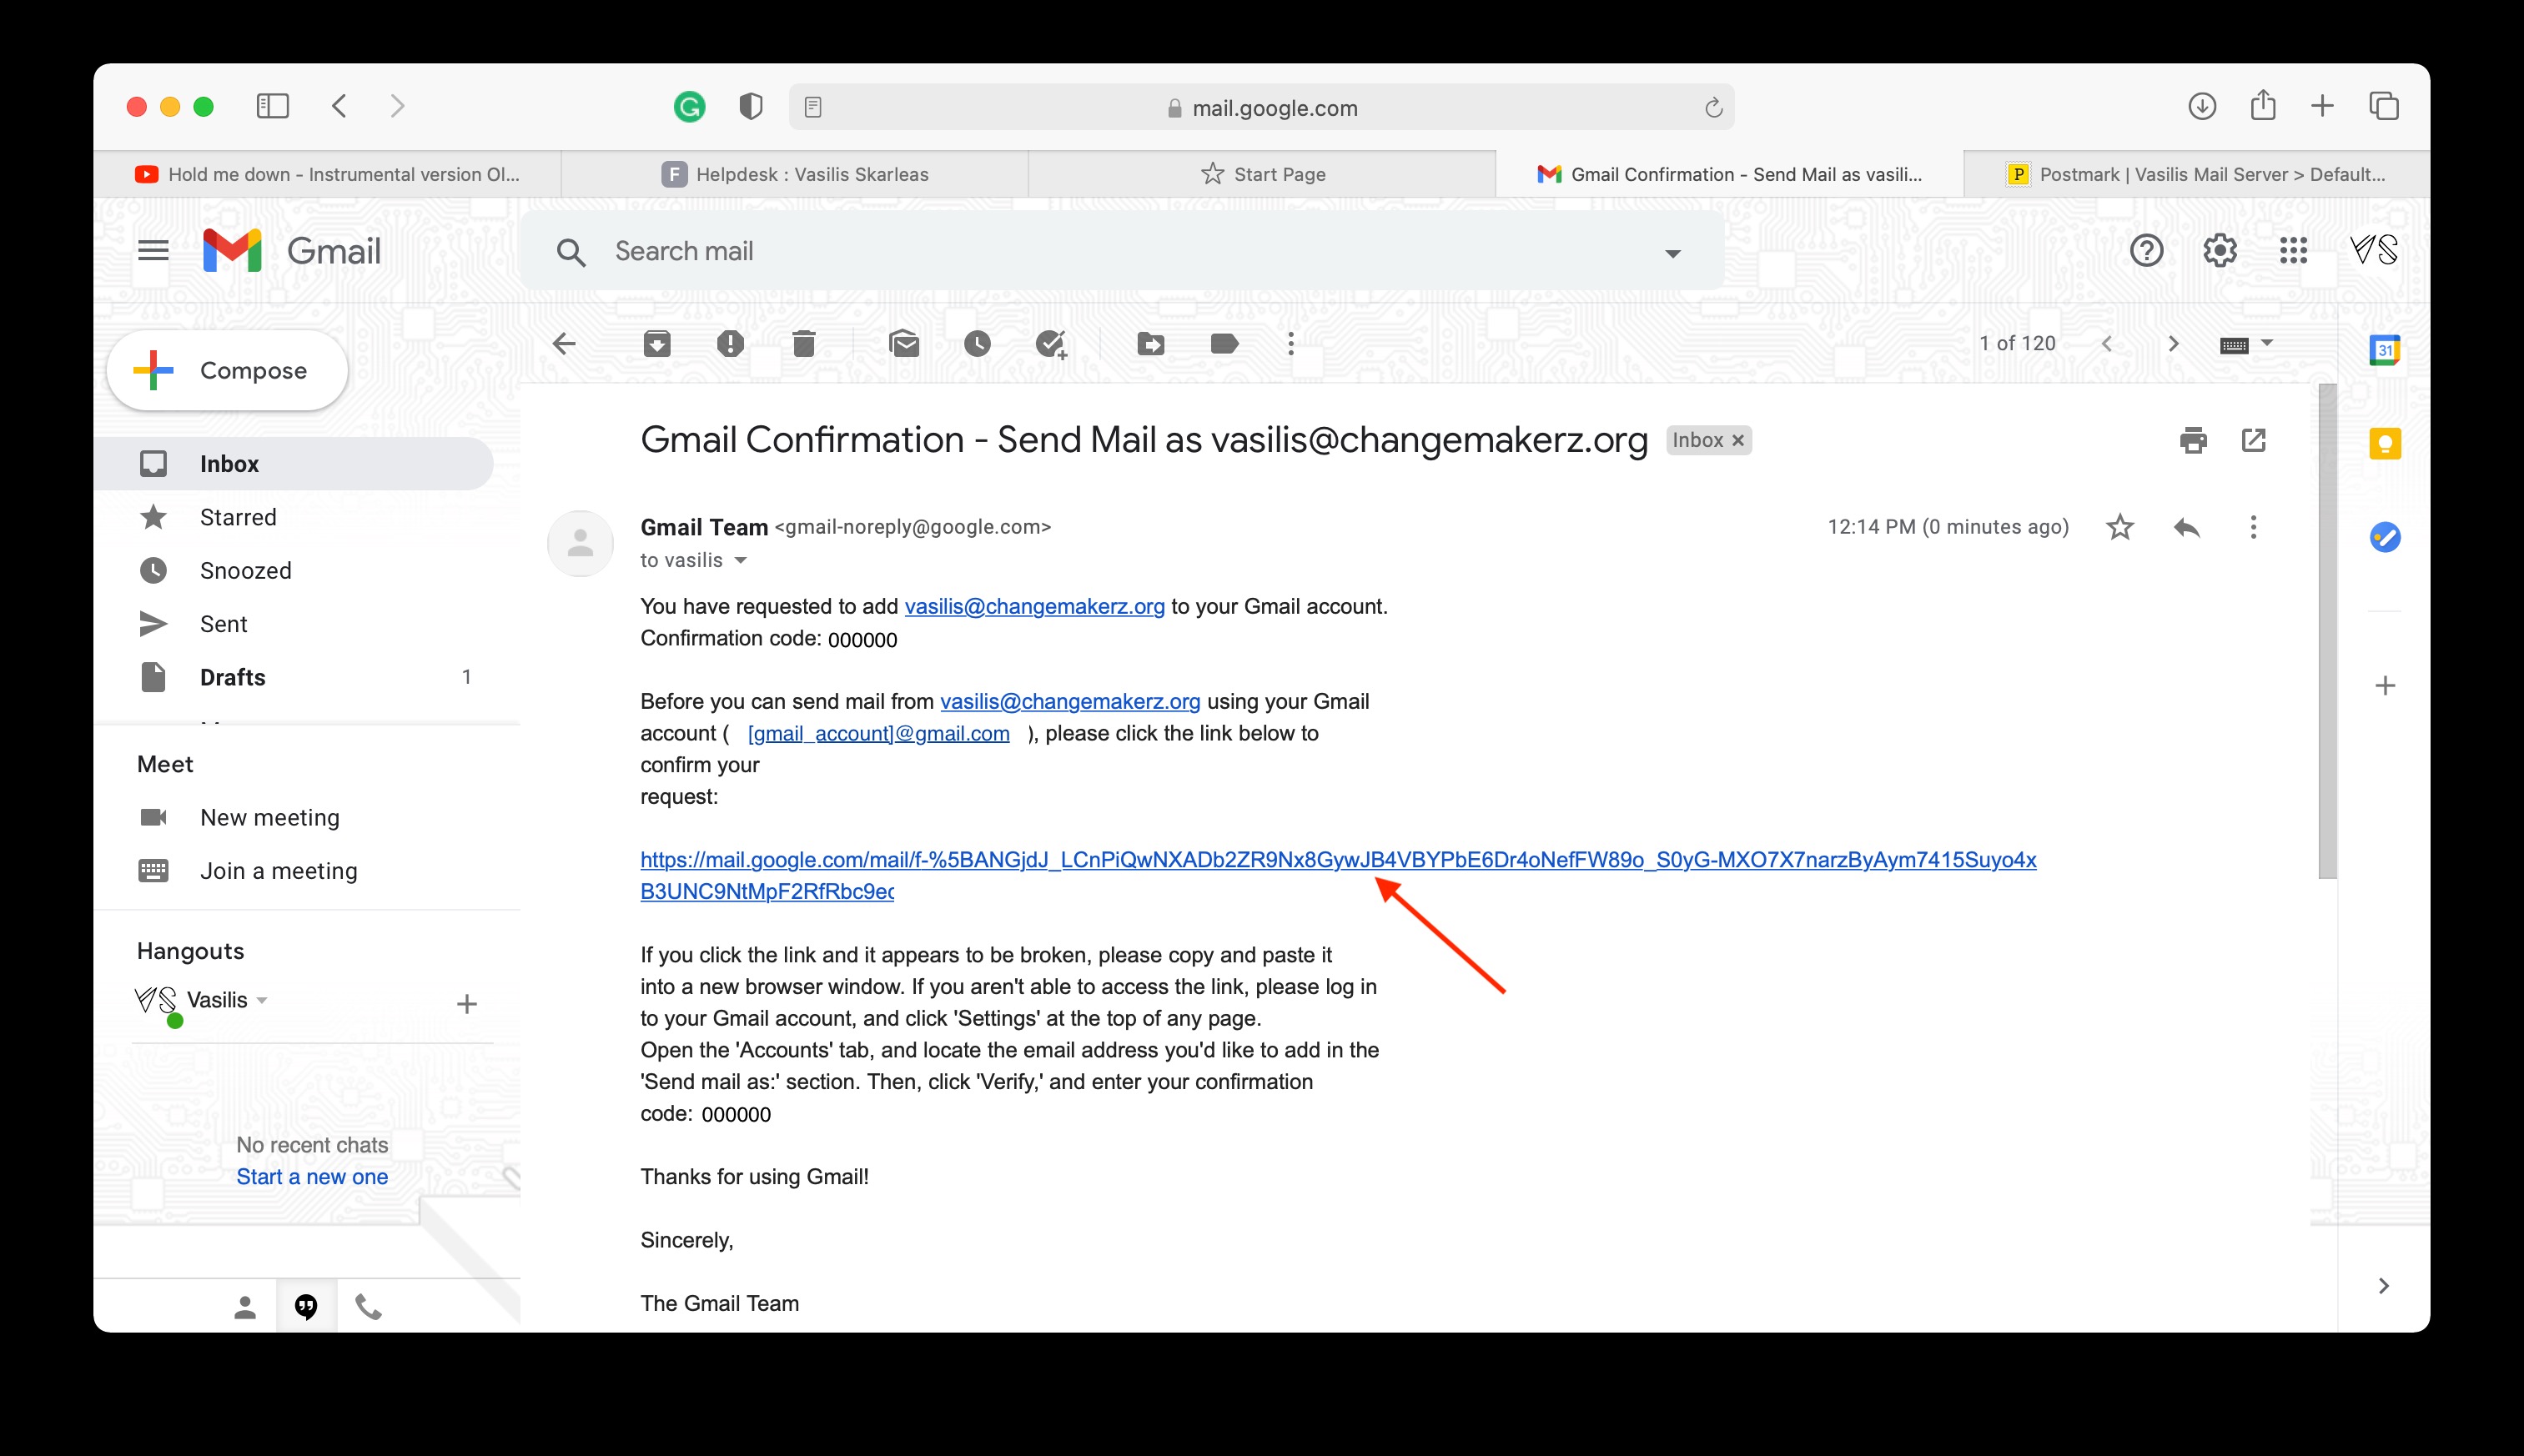
- Done!


